Latest Articles

Understanding Tag Firing Options in Google Tag Manager

Google Tag Manager (GTM) has become an indispensable tool for digital marketers and website administrators. It allows for easy management and deployment of various tracking tags on a website without the need for manual code changes. One of the key aspects of GTM is understanding the tag firing options, which determine when and how tags are triggered. In this article, we will explore the most common tag firing options available in Google Tag Manager and discuss their significance in the tagging process.

The most common trigger options in GTM

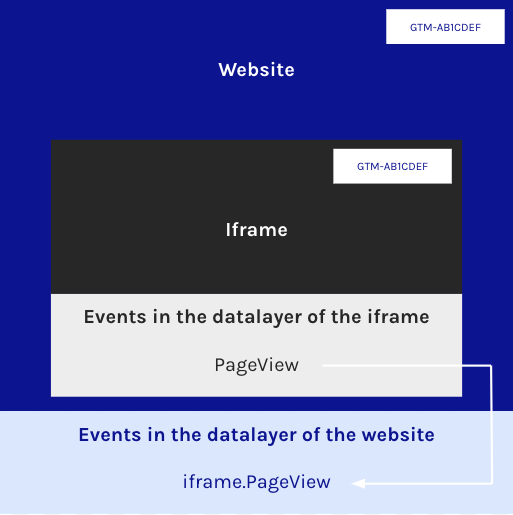
1. Page View Trigger:

The most common and straightforward tag firing option in GTM is the Pageview Trigger. This trigger fires a tag whenever a specific page or all pages on a website are loaded. It is typically used for tracking pageviews, capturing basic analytics data, and implementing third-party scripts that need to be present on every page.

2. Click Trigger:

Click Triggers are useful when you want to fire a tag based on user interactions, such as button clicks, form submissions, or link clicks. You can configure the trigger to activate when a specific element or set of elements on the page is clicked. Click Triggers provide valuable insights into user behaviour and allow for tracking specific actions that occur on a website.

3. Scroll Trigger:

Scroll Triggers fire tags when a user scrolls to a specific point or percentage of a page. They are particularly helpful for tracking user engagement, measuring scroll depth, and implementing event tracking based on scroll behaviour. Scroll Triggers enable you to understand how far users scroll down a page and identify areas where they might be losing interest.

4. Timer Trigger:

Timer Triggers allow you to fire tags based on time-based intervals. You can specify when a tag should be triggered after a certain time has passed since a page was loaded or since the last interaction occurred. Timer Triggers are useful for tracking engagement duration, implementing custom conversion tracking, or displaying targeted messages after a user spends a specific amount of time on a page.

5. Form Submission Trigger:

Form Submission Triggers fire tags when a user submits a form on a website. They are ideal for tracking form submissions, lead generation, or e-commerce conversion tracking. By configuring a Form Submission Trigger, you can capture data at the precise moment a user completes and submits a form, allowing for accurate measurement of form conversion rates.

6. Custom Event Trigger:

Custom Event Triggers provide the most flexibility in tag firing options. They allow you to define and trigger tags based on custom events that occur on a page. You can use JavaScript or data layer events to trigger tags based on specific user interactions or actions that are not covered by the predefined trigger types. Custom Event Triggers empower you to track unique events tailored to your website's requirements.

Conclusion

Google Tag Manager offers a wide range of tag firing options, each designed to capture different aspects of user behaviour and track specific events on a website. Understanding these tag firing options is crucial for implementing effective tracking strategies, measuring key metrics, and gaining valuable insights into user engagement. By leveraging the power of tag firing options in Google Tag Manager, marketers and website administrators can optimise their tracking implementations and make data-driven decisions to enhance website performance and user experience.

{snippet justinecremer-en}

The Investigation Phase: Setting the Foundation of Wave

This article is the first of a series on the essential phases of software development. It will be divided into 5 main topics: analysis, design, development, testing and deployment. As you will see later in this article, the first one will explain how important the analysis phase is before starting to develop a solution. The second article will cover the main steps to ensure you are designing your application the right way. The article on the development will explain how we are organizing our development process. Finally, we’ll see how important testing is and how we can deploy our solution.

Throughout this series we’ll take Wave as our example. Wave is a web application used every day by all the Semetissians. It helps us gather and visualize the data from various advertising platforms in one place (Check the article to know more). In 2021 we decided to rebuild it from scratch for many reasons. One of the main reasons was that we did not follow the essential phases of development. We learned from that and took a step back to better develop the second version.

Nowadays the world of software development is constantly changing, new applications and websites are developed every day. Before diving into the code, developers need to set the fundamentals for the entire project. During this analysis, the development team usually conducts research in order to define the scope of the project. A good way to gather information can be to conduct interviews or review an existing solution. This will help the team to have a better understanding of what they essentially need to develop. Skipping this phase would potentially mean a waste of time and resources. Therefore, it is crucial to run a good analysis to estimate accurately the release date of each deliverable. In addition, this phase helps to identify potential innovation and improvement opportunities that can lead to a better user experience or improved software performance. At Semetis, we like to call it the “Investigation phase

Let’s now see how we have approached this on Wave. While building this application, we put a special focus on the investigation phase to ensure the objectives and requirements of the project were well understood. First, we wanted to point out the strengths and weaknesses of our existing V1 tool. This helped us in taking the right decisions to improve the user experience. For example, one weakness that came out the most from interviewing the users was the loading time of the dashboards, which could take several minutes. Therefore we decided to put a lot of effort and resources into increasing our page speed.

With all the feedback we gathered from the users, we sat down with the developers at Atlas, Semetis' R&D department. Together, we defined the new architecture, database schema and features for this new version of Wave. This collaborative process allowed us to define a clear scope for the project and set realistic goals for the development team.
The investigation phase was crucial in laying the foundation for Wave's development. Thanks to this process, we had a clear idea of the features we needed to implement and what data we would be working with throughout the project. This allowed the development team to start working on the project with a clear roadmap and well-defined goals. This was on its own translated into a concrete timeline.

In summary, the investigation is a crucial step in the development of an application or website. Through research and analysis, the development team can establish a solid foundation for the project, understand the goals of the project, identify the potential risks and opportunities and effectively plan the next phases. Neglecting this phase can lead to wasted resources, unsatisfactory results, and missed opportunities.

{snippet maximedenis-en}

Overcoming the challenge of iframe tracking

If you already did some research about iframe tracking, you might have read people complaining that it is technically difficult to track user interactions within an iframe due to the inability to access its content from the parent page. Contrary to popular belief, you can still make it work! There are multiple solutions and we will present one of them in this article. We will explain the methodology by looking at a simple use case, without going into technical details.

Before going further, let’s get back to what an iframe is. Iframes, or "inline frames", allow website owners to embed content from other sources directly into web pages. This can be useful for incorporating videos, social media feeds, and other types of content without having to host it on their own server. In a nutshell, an iframe is a page within another page.

A simple use case: booking an online appointment on a website

In our case, we want to track what happens within an iframe that allows people to book an online appointment directly via the website. The tool to book an appointment is an iframe because it runs on a different domain. In order to track user interactions, we used the scripts from Simo Ahava. No need to reinvent the wheel when there are already great resources out there. Practically speaking, this is our methodology:

  • Implementation of one custom HTML tag for the parent page and one custom HTML tag for the embedded (child) page
  • Implementation of the same GTM Container ID on both the website and the iframe

By doing so, the parent can "listen" for messages and events that happen in the iframe and track them on behalf of the embedded page. All the technical explanations can be found in the article mentioned above. However, if you are not familiar with the code, read on to understand how it works concretely.

Let’s say we go on the website to book an appointment. When starting the appointment booking process, it opens the iframe. This triggers a “PageView” event in the datalayer of the iframe (child) which is sent to the datalayer of the website (parent) under “iframe.PageView”.

Iframe

When starting to book an appointment, the same process happens at every step:


Steps

Events in the datalayer of the iframe

Events in the datalayer of the website

Tags triggered

#1

Select appointment category

PageView

iframe.PageView

iframe_category

#2

Select agenda

PageView

iframe.PageView

iframe_agenda

#3

Select date & time

PageView

iframe.PageView

iframe_date_time

#4

Confirm appointment

PageView

iframe.PageView

iframe_appointment_confirmed

To give you more details, if we take the first step when we select an appointment category:

  • A specific value is populated for the category in the dataLayer which will be used as a trigger
  • A “PageView” event happens in the iframe environment
  • An “iframe.PageView” event happens in the website environment
  • The relevant tag (“iframe_category” in this case) is triggered

Gain valuable insights into user behavior and better optimize your campaigns

Thanks to this implementation, we were able to track all steps of the appointment booking process. We sent this data back to our analytics platform, in order to analyze global data and the drop rate from one step to another. On top of that, we sent the data to our advertising platforms, in order to use it to optimize our campaigns. This was a big change, as we used to optimize our campaigns towards people clicking on the “book appointment” button, which did not represent the amount of people going until the last step of the funnel.

To conclude, while iframes can be challenging to track, there are multiple ways to do so. More importantly, it gives you relevant information about user interactions in order to improve the user experience and it gives more data to the algorithms to optimize your campaigns. Don’t hesitate to reach out to Semetis if you need assistance with iframes!

{snippet justineheeren-en}

%MCEPASTEBIN%

Understanding GBRAID: The difference with WBRAID and GCLID

Recently, many advertisers got an email titled: “Important: GBRAID parameter will be enabled for your URLs to measure your iOS14.5+ conversions”. But what is the GBRAID parameter exactly, and how will it affect your tracking?

What is GBRAID?

Since Apple’s ATT policies took effect in 2021, Google no longer sends the Google Click Identifier (GCLID) for iOS 14 traffic coming from ads on Google apps. For any "web"-campaign (i.e. a campaign which sends traffic from a search engine or any other website), you will still be sending GCLID parameters if auto-tagging is enabled. You'll be able to identify the campaign and other attributes of the click associated with the ad for ad tracking and campaign attribution. Your URL will look like this:

GBRAID 1

GBRAID is the new parameter that measures app conversions driven by ad campaigns on iOS under the legal compliance of Apple’s ATT framework. GBRAID is used for app-to-app measurement, so it is basically used for the handful of Google apps that are sending ad traffic. WBRAID is another parameter that is used for web-to-app measurement.

Very simply put (note that this is only for iOS campaigns):

GBRAID 2

Why are GBRAID and WBRAID compliant and GCLID isn't?

The key distinction between GBRAID, WBRAID, and GCLID lies in their compliance with user privacy. GBRAID and WBRAID prioritize user privacy by offering aggregate reports on conversions, ensuring that individual users cannot be identified or linked to specific cross-site behaviors. These parameters employ de-identification techniques and other aggregation methods to maintain user anonymity.

In conclusion, GBRAID serves as the replacement parameter specifically designed for app-to-app measurement, enabling the tracking of conversions driven by ad campaigns on iOS devices within the boundaries of Apple's privacy regulations. Meanwhile, WBRAID is another parameter used for web-to-app measurement. These parameters align with Apple's privacy-focused initiatives while providing valuable insights into ad performance and conversions.

{snippet robbedesmyttere-en}

Subcategories

Semetis Icon